It is important that you create Guest Network for guests that come to your home often so they will be able to connect to a separate network and able to connect to the internet. All of your home devices will be connected to your home network while the guests will be able to access the internet using the guest network. This will also keep your home network safe, if some malware was to end up on the guest devices then it would not be able to penetrate any further and your data won’t be compromised.
How To Create Guest Network on TP-Link Router?
To create a guest network on your TP-Link Router, follow this step-by-step guide below:
- The first thing that you should do is log in to the Admin Panel of the router. To do that, open a web browser.
- Type http://tplinkwifi.net in the address bar and press Enter.
- A login window will appear, asking you to enter the login username and password.
- Enter the login username and password & click on Log In.
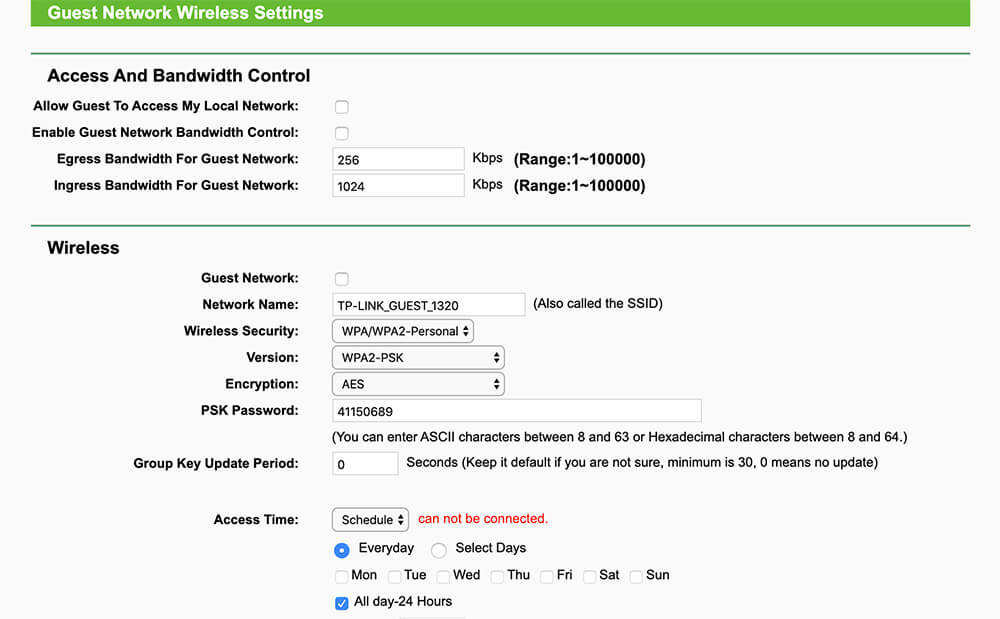
- Once you are inside the Admin Panel of the router, go to Advanced > Guest Network and scroll down to the Wireless Section.
- Now, select the frequency of the network, either 2.4 GHz or 5 GHz.
- Click on the Enable Guest Network checkbox to enable it.
- Enter the SSID for the Guest Network. (Select Hide SSID if you want your guests to manually input the SSID)
- Select the Type of Security and also enter the password for the Wi-Fi Network.
- Click on Save. The guest network would now have been created and guests will be able to join it using the password.